13th-Century Quilted Mittens
The mitten is one of the most important elements of the equipment set.
Experience has shown that the hand is the part most frequently injured in tournaments,
and—though less often—more severely injured in melees (*buhurts*). Therefore,
impact resistance is a mandatory requirement for the mitten. On the other hand,
the mitten must be as comfortable as possible. Let us try to combine these qualities
and create a good quilted mitten. By the way, I strongly recommend making the
left and right mittens identical in thickness. Firstly, mismatched mittens look
unattractive; secondly, if you decide to fight with a two-handed weapon,
you will need protection for both hands.
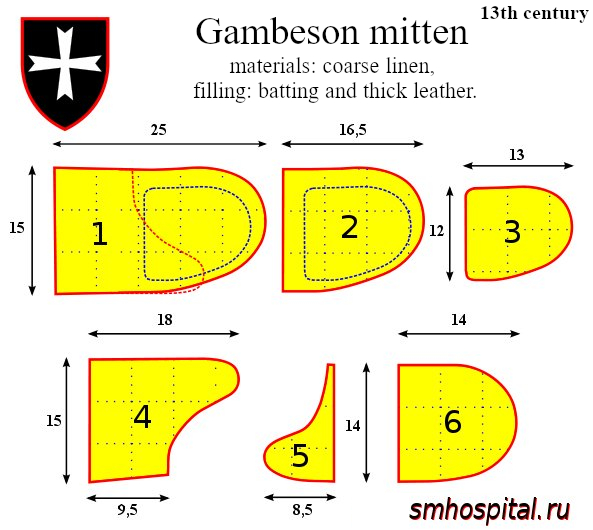
Figure 1 - Patterns for 13th-century quilted mittens.
The patterns feature 5 cm markings indicated by a fine dotted line.
The miniatures also reveal the direction of the quilting.

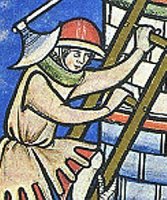

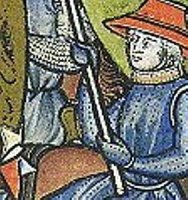
Figure 2 - Miniatures, Maciejowski Bible, 1250
It is best to start with the left mitten (if you are right-handed); only after fully assembling it should you proceed to the right one— this way, you have a chance to make the right mitten more comfortable by correcting any errors made during the initial sewing process.
Construction steps:
1) Rinse the fabric (linen or cotton) in warm water and let it dry.
2) Cut out the paper patterns. You can either print them at the correct scale or draw them yourself. To make tracing easier, the patterns feature a fine dotted grid with 5 cm spacing. 3) Cut the material according to the patterns: leave a 5 cm seam allowance on the fabric, but cut the batting exactly to the pattern outline.
Required number of pattern pieces for one mitten:
- Pattern 1 – fabric pieces: 3 total; the two intended for the outer layer should be extended by an additional 10 cm toward the wrist (to allow for attachment to the quilted section later). Also, 5–6 layers of batting are required.
- Pattern 2 – 5–6 layers of batting.
- Pattern 3 – thick leather (sole leather/butt leather).
- Pattern 4 – fabric pieces: 3 total. Two of these should be extended by an additional 10 cm toward the wrist. Also, 5–6 layers of batting are required.
- Patterns 5 & 6 – one fabric piece each (for the palm).
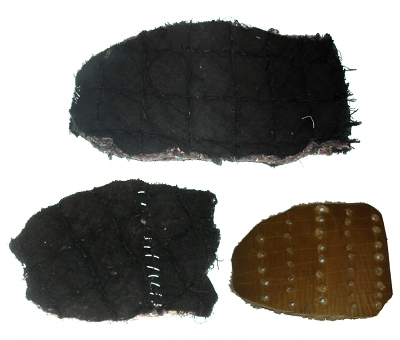
Figure 3 - Cut material (batting pieces for patterns 1, 2, and 3)
5) Sew the batting pieces for patterns 1 and 2 together at the ends so that pattern 2 forms an arc while pattern 1 remains straight (see Figure 4a). Naturally, the curves of the pattern pieces must align (note that the pieces are slightly curved downwards). The curve is designed to allow the thumb to rest comfortably when the fist is clenched (Figure 1 shows which side of pattern piece 1 accommodates the thumb—indicated by the red dashed line).
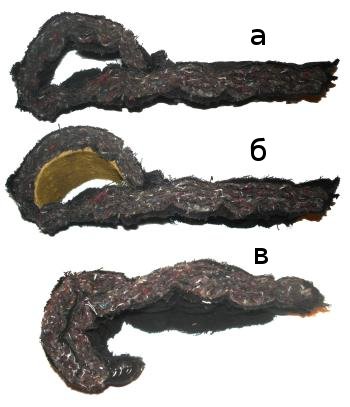
Figure 4 - Joining pattern pieces 1, 2, and 3
7) Place the marked fabric against pattern piece 3 and use a large drill bit to make holes in the leather at the intended quilting points. In principle, this step can be skipped—piercing the leather during the actual quilting process is an option—but doing so is difficult.
8) Insert pattern piece 5 in an arc between pattern pieces 1 and 2 (see Figure 1b). Pattern piece 3 is narrower than pattern piece 2; it must be shifted toward the thumb side and positioned 5 mm from the edge (see the figure: the blue dashed line represents pattern pieces 1 and 2). This results in pattern piece 3 lying 5 mm from one edge while being spaced about 2–3 cm away from the other.
9) Bend the workpiece and quilt it along the "arc" so that it retains the bent shape (see Figure 1c). Shape the workpiece into a boat-like curve (fold the edges along the length of the piece toward the hand area) and stitch around the perimeter, drawing the edges together as you go.
10) Place the fabric pattern pieces labeled "1" onto the workpiece (two elongated pieces on top, one on the bottom) and baste them in place.
11) Quilt the workpiece following the marked lines.
12) Fold the fabric edges on the inner side of the workpiece and stitch them down.
13) Sew the fabric palm piece to the workpiece. Note that palm pattern piece "6" is narrower than pattern piece "1"; this causes the mitten to curve slightly into a boat shape. Since it is not possible to turn the workpiece inside out, the palm must be sewn on directly, folding the fabric edge inward (see Figure 5).
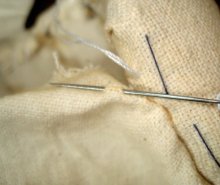
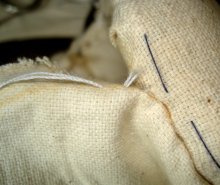
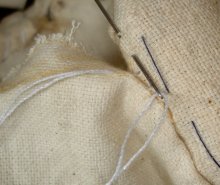
Figure 5 - Sewing on the palm with the edge folded inward
14) Baste the batting pattern pieces labeled "4" together. Curve the thumb pieces into a slight boat shape (though this is not strictly necessary) and stitch the edges.
15) Assemble a "sandwich" using the pieces labeled "4": place one fabric piece at the bottom, followed by 5–6 layers of batting, and top with the two elongated fabric pieces. Baste together.
16) Mark the quilting lines with a regular pencil, quilt the layers, and fold the fabric edges inward.
17) Sew piece 5 to assembly 2, following the same method used for piece 6.
Assembly 2 is now complete.
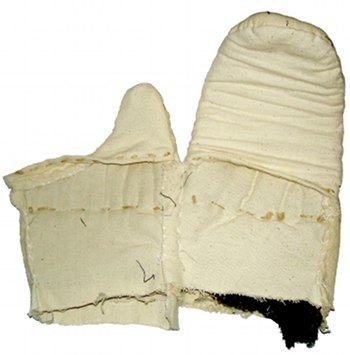
Figure 6 - Assemblies 1 and 2 - basted together on one side
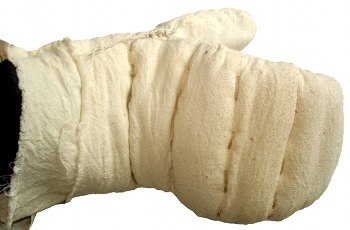
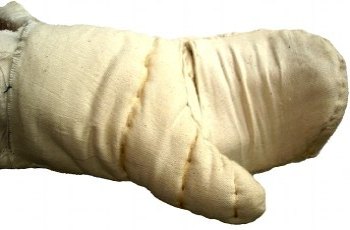
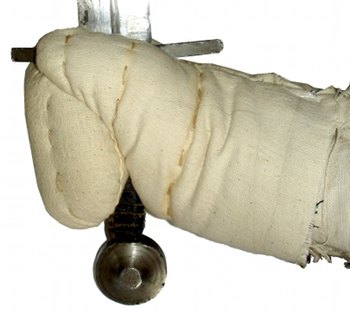
Figure 7 - Finished mitten - all that remains is to sew it to the padded sleeve
If the work is done well, this type of mitten does not hinder movement at all and withstands heavy blows. The hand slips out through a slit in the palm (or rather, an area we simply left unsewn). For extra protection, we create a mail sleeve with an integrated mitten.
Good luck with the project! )))
Author © Enton, 2009
Comments (17)
All comments