13th-Century Footwear
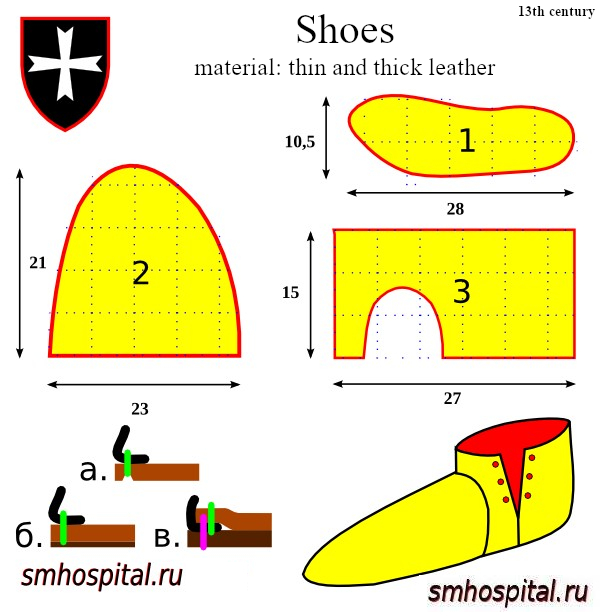
Figure: 13th-century footwear patterns.
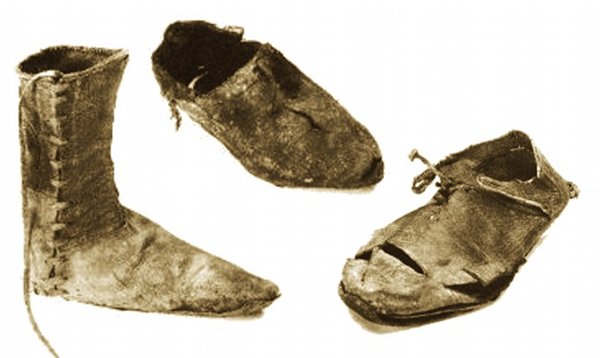
Figure: Footwear from the late 13th and early 14th centuries.
13th-century footwear was quite varied, ranging from wooden slippers to leather shoes. This is evident from the many surviving examples. This article presents one of the simplest models. All patterns are approximate and sized for a European size 43 foot.
Preparing the patterns:
1) Pattern 1: Place your foot on a sheet of paper and trace its outline. Then, expand the outline outward to shape it into the pattern form (as shown in the figure). Alternatively, you can use a modern shoe of your size—such as a sneaker—as a reference. Cut out pattern piece 1.
2) Measure the length of pattern piece 1 and recalculate the dimensions for pattern pieces 2 and 3 using the formula:
New_size = (Old_size * New_length) / Old_length,
where Old_length = 28, and New_length is the length of the pattern piece 1 you just cut out.
3) Draw and cut out pattern pieces 2 and 3 using the new dimensions.
4) Next, assemble the slipper from the paper patterns (using glue) and ensure it fits comfortably on your foot. If it pinches anywhere or is too loose, adjust the pattern accordingly.
Ideally, you should cut pattern pieces 2 and 3 from sturdy fabric and the sole from cardboard using your paper templates, then glue them together to form the slipper.
Pay the most attention to this step; the comfort of your footwear depends on it.
Construction:
5) Once the paper patterns are adjusted, cut the pieces from leather—start with just one foot. Piece 1 is made from sole leather (thick, firm leather, 4–5 mm thick), while pieces 2 and 3 are made from thinner leather (preferably a firm leather about 2 mm thick).
6) Begin assembling the slipper. Use a very thick, strong thread for stitching; it is best to fold the thread over 2–4 times (use a needle with a large eye). Sew piece 2 on, starting at the toe and working outwards in both directions simultaneously—using two needles and making 2–3 stitches at a time. Attention! Tie a knot after every stitch! This prevents the footwear from falling apart immediately if the thread wears through in one spot. At this stage, you have something resembling a homemade slipper. It should be perfectly comfortable and align with piece 3 (which it will, provided step 4 was done carefully); otherwise, undo the stitching and redo it.
7) Apply contact adhesive (like Moment glue) to the seam from the inside to make the footwear more water-resistant. Be careful—don't stain the leather.
8) Sew piece 3 to the sole. It should overlap slightly (by 5 mm) underneath piece 2 at the sole area. Apply adhesive to the seam in the same way.
9) Sew pieces 2 and 3 together, with piece 3 overlapping piece 2. There should be an overlap of about 5–8 mm along the entire seam.
10) Sew the connection point of piece 3 (where the laces go) at a height of approximately 2–3 cm from the ground. Again, there should be an overlap of about 4–5 mm. Make sure the slipper fits your foot.
11) Make holes for the lace. Cut the lace from thin leather.
12) Attach a second sole if necessary (see below).
13) Put them on, enjoy, and leave a comment about any issues or successes...
How to attach the sole:
There are three methods for stitching components 2 and 3 to the sole (see diagrams a, b, and c on the pattern).
a) A triangular groove is cut along the entire outline of the sole, 4 mm from the edge and approximately half the depth of the leather's thickness. Next, holes are pierced into the groove using an awl, spaced 5 mm apart, and the shoe is stitched together (the thread is shown in green). This way, the threads sit inside the groove and do not wear down while walking.
b) This method is similar to the previous one (using a groove is still preferable, though not strictly necessary), except that after the shoe is stitched, an additional layer of leather cut to the shape of the sole (preferably a thick piece) is glued to the bottom (using a contact adhesive like Moment). This layer protects the threads and the sole itself from abrasion. When it wears out—which will happen sooner or later—you simply peel it off and glue on a new one. Methods (a) and (b) have drawbacks: the threads gradually wear down, and the upper part may eventually detach from the sole. Additionally, footwear made this way does not offer good moisture resistance and soaks through quickly when walking on wet grass or through puddles.
c) This is the best method, though it is also the most labor-intensive. I highly recommend using this approach. Two soles are prepared: one is made approximately 1.5–2 mm smaller (as if 2 mm had been trimmed off the outline of the first sole on all sides). Components 2 and 3 are stitched to the smaller sole from the bottom side (see diagram—the thread is shown in green). Once the shoe is stitched, the larger sole is glued to the bottom (using contact adhesive). For added strength, it is secured with wooden pegs (shown in pink in the diagram)—while not strictly necessary, this is highly recommended. First, drill small holes (or pierce them with a thick awl) along the outline of the sole, ensuring they pass all the way through the bottom sole and halfway into the upper one. Then, pour some glue into the hole and insert a matchstick. You should first whittle the matchstick into a round shape and give it a slightly pointed tip. Wooden toothpicks work well too (though you need to blunt them by cutting off the sharp tip, leaving only a slight taper). Trim the excess length of the matchstick, but not flush with the surface; leave about 1–2 mm protruding. Finally, once all the wooden pegs are inserted and the glue has dried, tap the protruding ends with a hammer to flatten them out.
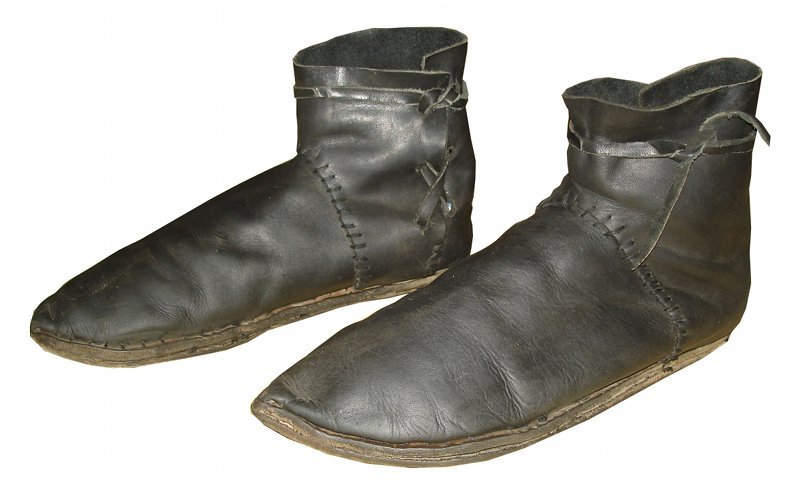
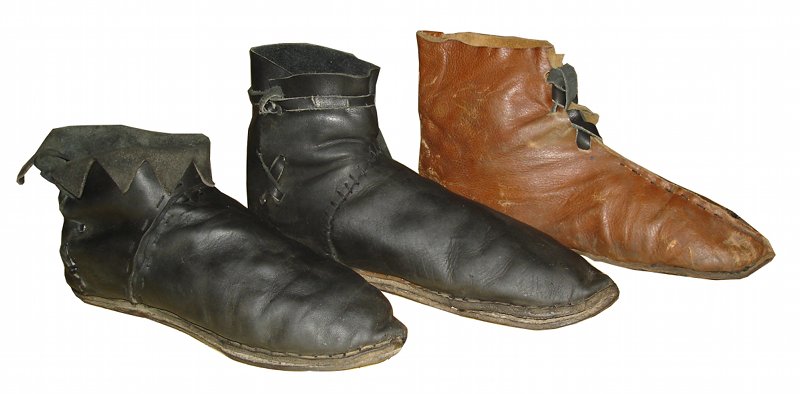
Image: Finished footwear.
Other examples of 13th-century footwear can be found online. I highly recommend visiting the Utulsa footwear site and its subsection on 13th-century footwear.
Here are some other examples of medieval footwear:
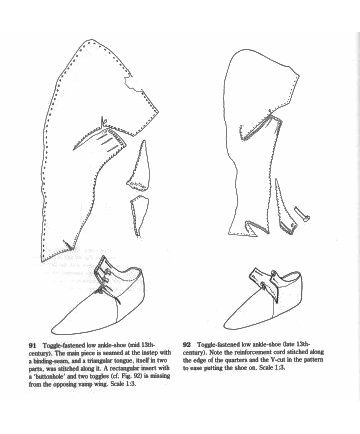
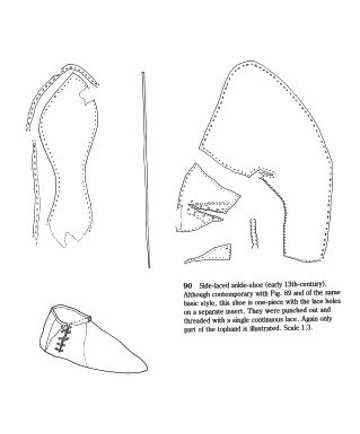
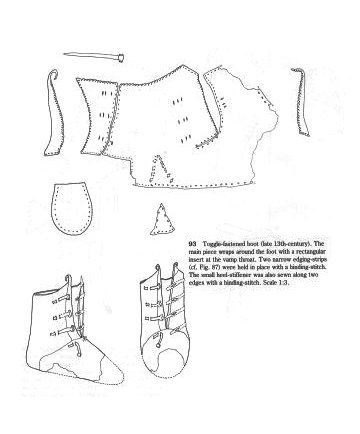
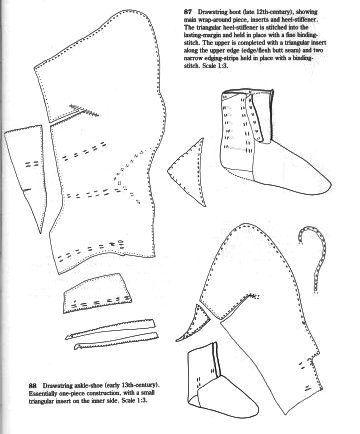
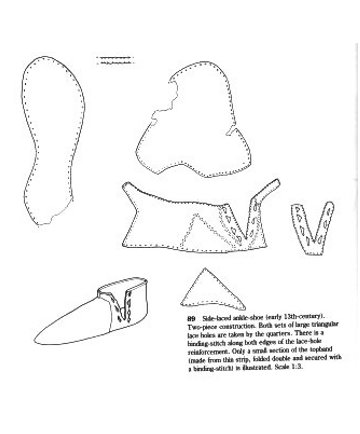
Figure – 13th-century footwear styles.
List of sources
1. "Shoes and Pattens (Medieval Finds from Excavations in London)" Francis Grew and Margrethe de Neergaard
2. Utulsa про обувь
© Enton, 2009
Comments (4)
которая на голине пришлось перешивать под себя а так все чики пуки)
<br>Еще бывают спец. иголки с разомкнутым ушком. Такой протыкаешь, затем захватываешь нитку изнутри и вытягиваешь ее.