Scabbard
As you probably already know, the primary purpose of a scabbard is to keep the sword in "comfortable conditions" so it does not rust.
A bit about the technology: scabbards were typically made of wood and covered in leather. Nowadays, choosing wood as a material seems somewhat impractical, as wooden scabbards break quickly during foot tournaments and mass melees (as I have learned from personal experience). However, in the 13th century, this was not an issue, since battles were fought primarily on horseback.
Below, we will describe the process of making a wooden scabbard, as well as a version made of thick leather styled to look like wood.
1) Let's look at two options for making the scabbard core: leather or wood:
-
Leather:
- Create a paper pattern: trace the sword and add a 5–6 mm margin around the entire outline. Additionally, extend the pattern's length by 1 cm. Shape the bottom of the pattern into a slight point.
- Cut two pattern halves out of thick leather (such as saddle leather or *cheprak*). Also, cut two strips, 4 mm wide and as long as the sword (these strips can be pieced together). Cut out one additional element for the bottom of the scabbard—a "tail" piece (for the pointed section). This gives us five elements: two main body pieces, two strips, and one "tail" piece.
- Glue the two strips and the "tail" piece along the outline of one of the main halves (using a contact adhesive, for example).
- Place the second half on top and verify that the sword fits. If the combined thickness of the strips and the "tail" is less than the thickness of the sword, it is not a problem. The sword will still fit thanks to the curvature of the main halves (provided, of course, that your sword tapers toward the edges).
- Glue on the second half.
- Carefully round off the edges of the scabbard with a sharp knife so that, when viewed from the end, the shape is an elongated oval rather than a rectangle (essentially a rectangle with rounded corners). This step is essential. Some stages of the process are shown in Figure 1.
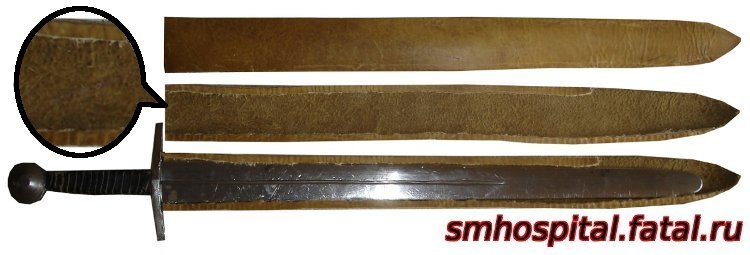
Figure 1. Leather scabbard core.
-
Wood:
- Create a template in the same way.
- Cut two halves from the wood using the template: one with a thickness equal to the sword's thickness plus 5–6 mm, and the other 5–6 mm thick.
- Use a chisel to carve out a recess for the sword in the thicker piece.
- Put the pieces together and ensure the sword slides in and out freely.
- Glue the pieces together.
- Round off the edges using a knife or plane, just as with the leather core. In principle, you can skip carving the wood with a chisel and use a method similar to the leather core: two 5–6 mm halves, two strips, and a "tail" piece with a thickness equal to the sword plus 1 mm.
You could make the core out of plywood—this is easier and stronger, but not historically accurate; leather would be preferable in that case.
The assembled wooden core is shown in Figure 2.

Figure 2. Wooden scabbard core.
2) At this stage, the core must be wrapped in thin leather.
-
To do this:
- Create a paper pattern with a width roughly equal to (core width + 10) × 2 along its entire length.
- Ensure the paper pattern wraps around the entire core—except for the very tip—with a little extra room to spare.
- Cut the wrap out of thin leather, leaving a 1.5 cm seam allowance on each side.
- Baste the leather together (rough side facing out).
- Check that the core fits snugly into the resulting sleeve. If the core slides in too loosely, baste it tighter; if it doesn't fit, baste it looser.
- Sew it with a simple stitch, keeping the rough side of the leather facing out.
- Turn the sleeve inside out.
- Insert the core into the sleeve, smoothing out the seam so that the seam allowances lie flat in opposite directions and the leather doesn't bulge. If you cannot slide it all the way in, you can rub the core with soap.
- To prevent the seam from bulging, you can apply a little glue at the very top of the sheath. See Figures 3 and 4 for the results.
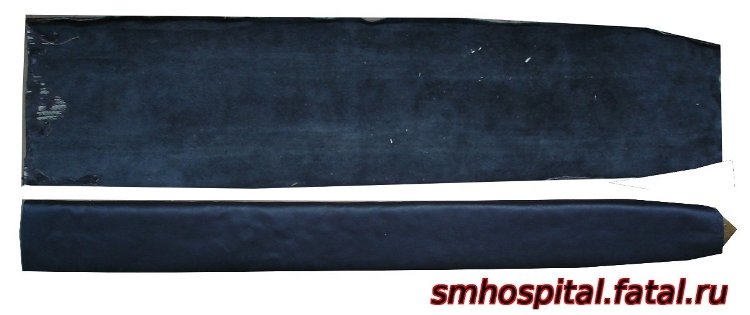
Figure 3. Leather cut for the wrap; core inside the wrap.
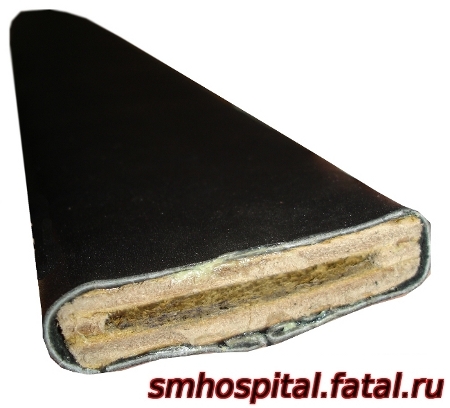
Figure 4. Sheath core inside the wrap, end view.
3) Now, a steel tip (or one made of copper or brass) needs to be fabricated. This is one of the most challenging stages.
- Create a rough pattern, including allowances.
- Cut out the blank from thin steel (0.8–1 mm).
- At the bend points, punch out two elongated indentations. Use a round-faced hammer against a wooden depression or a small-diameter steel ring. Since the steel is relatively thin, this operation can be performed cold.
- Next, shape the blank around the form and rivet it together. In principle, the task can be significantly simplified by making the tip out of two halves.
The result is shown in Figure 5.
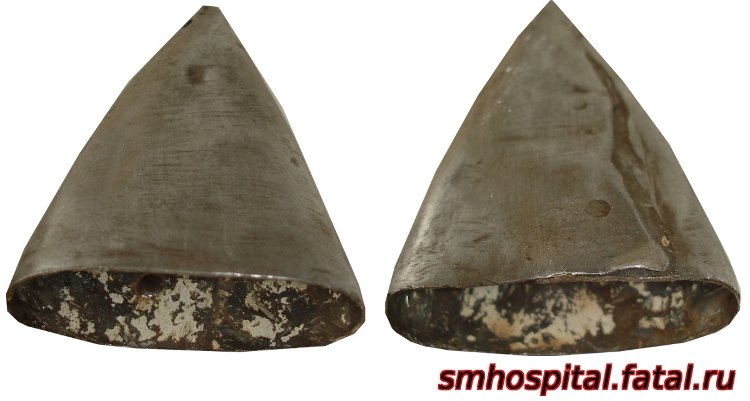
Figure 5. Scabbard tip, view from both sides.
4) Fit the tip onto the scabbard—Figure 6.
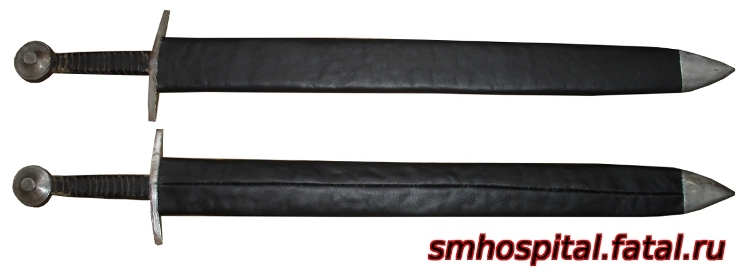
Figure 6. Scabbard with tip, view from both sides.
5) Finally, make the suspension strap. It consists of two parts.
The first part (Figure 7) is made from a strip of leather; one end is split lengthwise into three sections (it is best to taper them to a width of 6–8 mm after splitting). One section is tied into a loop sized to fit the scabbard; the second is tied into a loop but leaves a free tail; and the third remains free, with a slit cut into it (see Figure 8). Holes for the ties are made at the other end. It is best to punch these holes at the very last moment; for now, leave this section longer than necessary.
Needless to say, it is better to make a prototype out of fabric first (I strongly recommend this!) before cutting the final piece from thick leather.
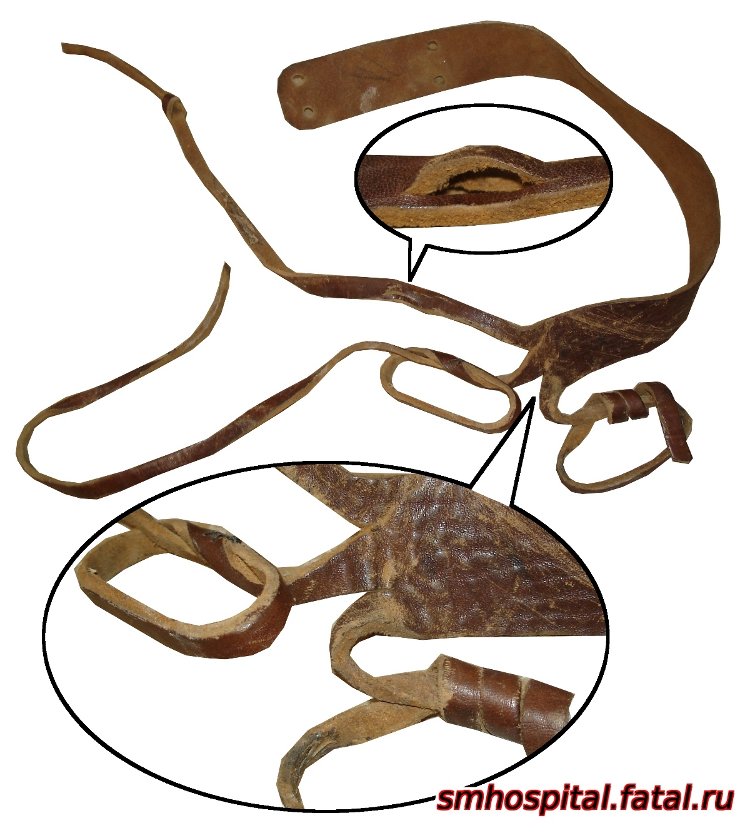
Figure 7. The first part of the suspension strap, featuring three distinct ends.
6) The second part is simpler to make (Figure 8): two ties are cut at one end, while the other end is tied with a leather cord into a loop sized to fit the scabbard. The scabbard should be a tight fit when passing through this loop (if it slides through easily, make the loop smaller—otherwise, the scabbard will fall out).
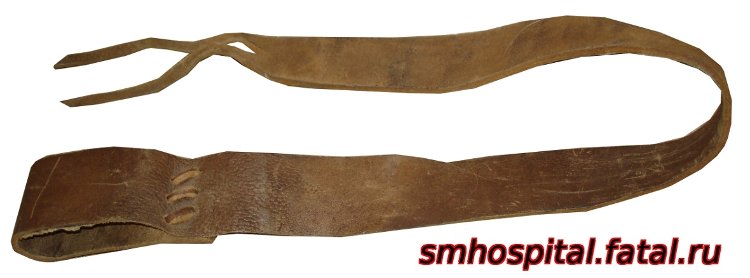
Figure 8. The second part of the suspension strap—the loop and ties.
7) Now, fit the suspension strap onto the scabbard as shown in Figures 9 and 10. It is a good idea to glue the strap to the scabbard in a few places to prevent it from slipping. However, if everything is done correctly and fitted well, it won't slip—this has been tested.
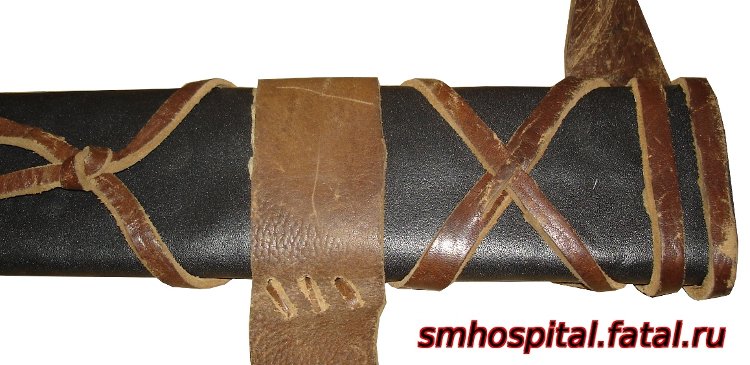
Figure 9. The strap (front view).
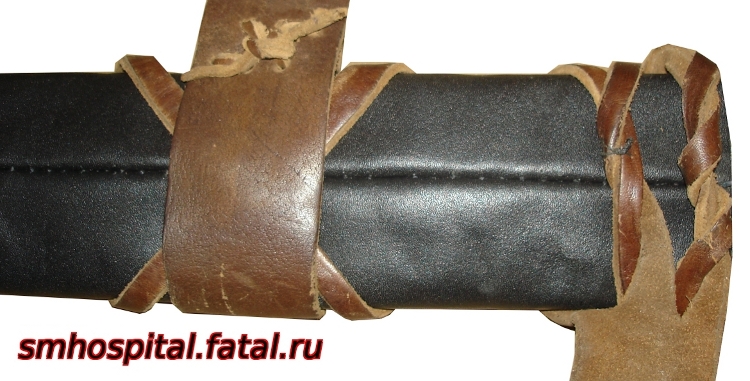
Figure 10. The strap (back view).
8) Let's return to the holes on the first section of the strap (Figure 7). You should make them while fitting the strap to yourself. In my version, there are two pairs of holes: one for wearing over armor and one for civilian clothes. Alternatively, you could attach a buckle.
9) The final step is to oil the scabbard. Generously coat the sword with a lubricant—preferably a solid one like heavy grease (e.g., Solidol), though any type, including standard oil, will work. Insert the sword into the scabbard to coat the interior. Repeat this process several times.
Hooray, the scabbard is finished! — Figure 11. Now your sword will always be well-protected.
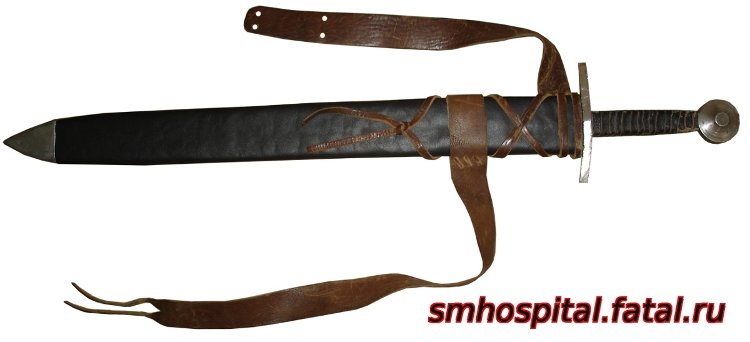
Figure 11. The finished scabbard.
© Enton, 2010
Comments (8)