Making a 13th-century kettle hat (Chapel)

Illustration: Maciejowski Bible. Kettle hat.
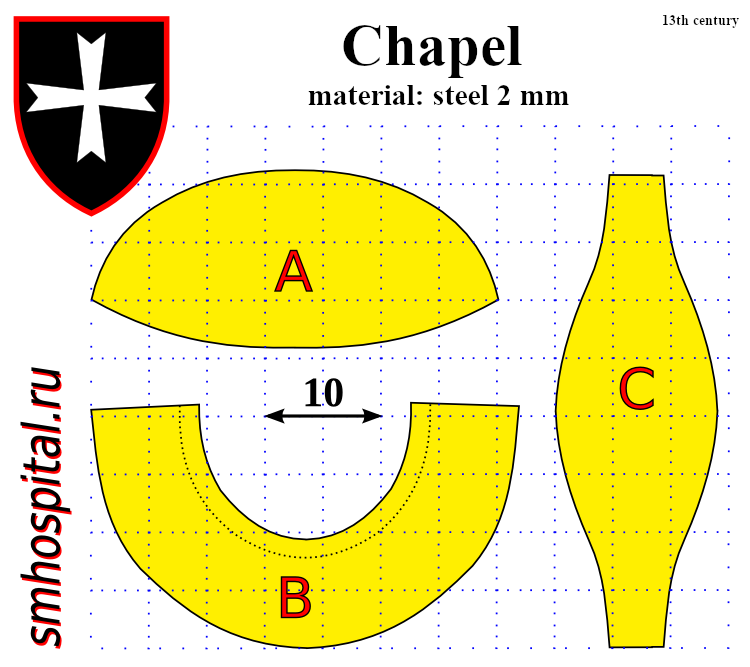
Illustration: Kettle hat patterns
Fabrication steps:
1) Cut out two copies of pattern A and two of pattern B.
2) Prepare a "depression" (or hollow) for shaping. For example, you can make a wooden one, as shown in the illustration.
You can also use an iron ring: a section of pipe 10–15 cm in diameter.
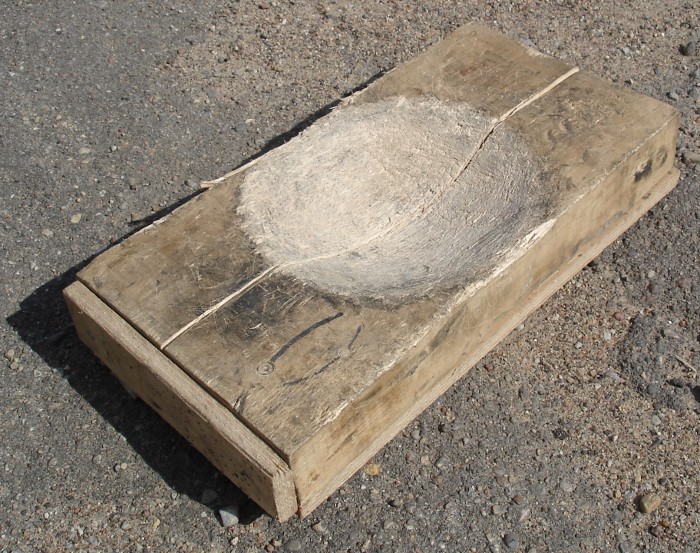
Illustration: Shaping depression
3) Shape pattern A pieces over the depression. This requires a hammer with a rounded head; you can make one by grinding down a standard hammer.
Place the workpiece over the depression and hammer it evenly. The workpiece will gradually curve into the desired shape.
The shaping process can be done "cold," without heating the workpiece (this is how this specific kettle hat was made). Heating the workpiece makes the shaping process easier.
4) Cut out pattern C from cardboard first. Test-fit it with pattern B pieces; adjust the size of pattern C if necessary.
5) Cut pattern C from steel, shape it slightly over the depression, and bend it to match the curve of the dome.
6) Drill approximately 11 holes along the edge of workpiece C for the rivets. The recommended rivet thickness (and corresponding hole diameter) is 4–5 mm.
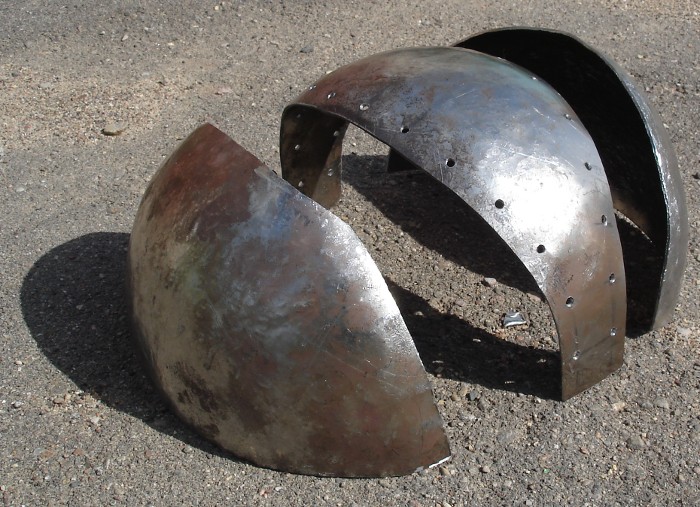
Figure: Formed dome blanks A and C
7) Rivet blanks B to blank C to form a complete dome.
8) Shape blank B as shown in the figure below.
9) Bend the edge of blank B along the dashed line. To bend it, place the blank on the edge of an anvil, positioning the dashed outline so it slightly overhangs the edge.
Gradually bend the edge with a hammer: first bend the entire outline by 20 degrees, then by 40 degrees, and so on.
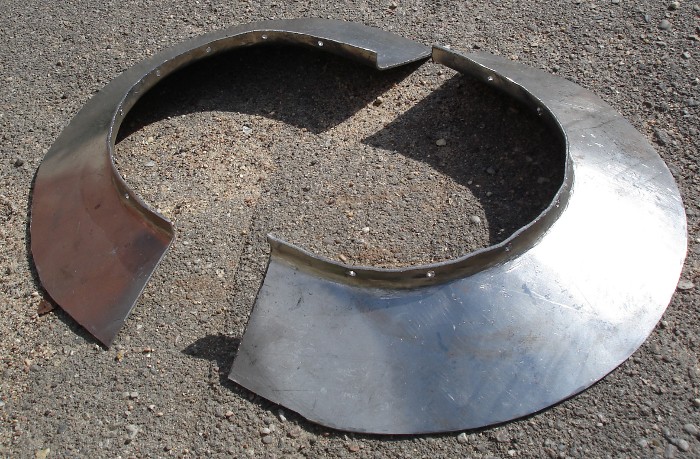
Figure: Shaped brim blanks B for the chapel de fer
10) Drill holes in the bent edge of the brim. Rivet the brim to the bowl (leaving four rivets unset for attaching the straps), starting from the front.
11) Rivet the brim sections together.
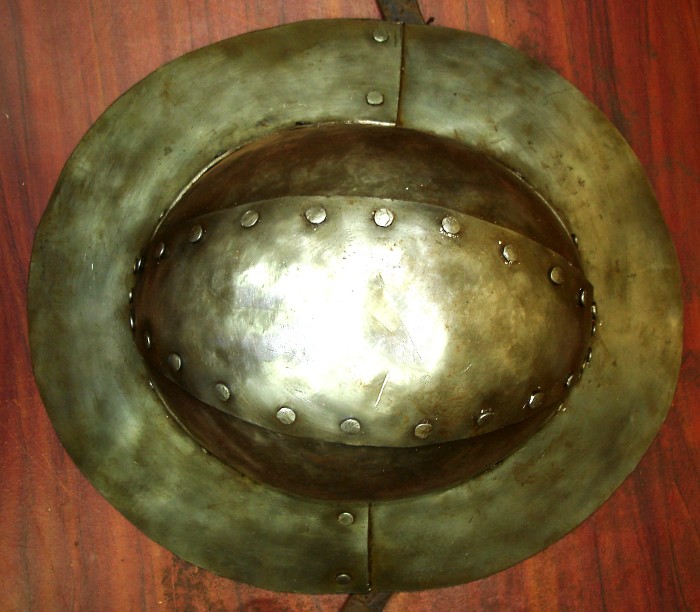
Figure: Riveted kettle hat
12) Prepare and rivet the straps in place. Note that the straps are Y-shaped. One end is riveted roughly in the middle of the kettle hat, while the other is closer to the rear. This secures the helmet and prevents it from sliding down onto your nose upon a frontal impact.
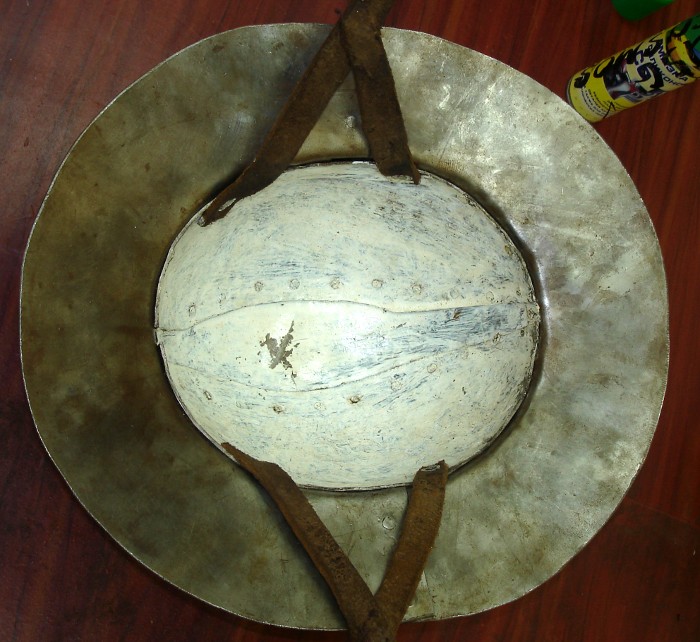
Figure: Strap attachment
12) Put on the kettle hat and, smiling broadly, count your teeth—for statistical purposes.
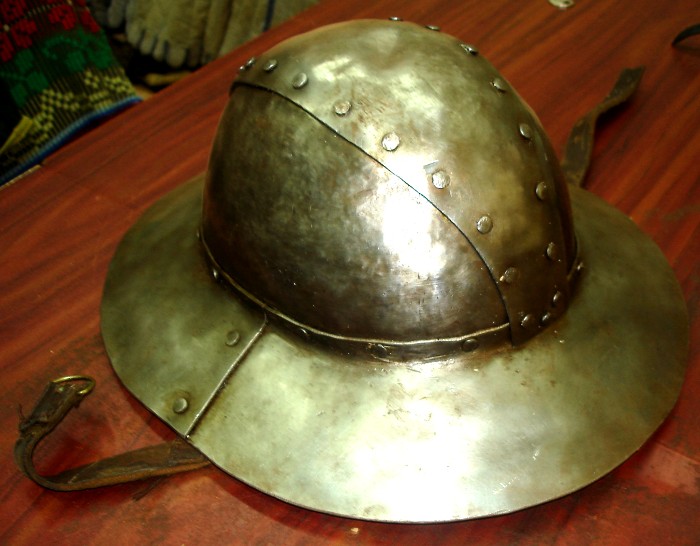
Figure: Finished kettle hat
© Enton, 2012
Comments (2)